Please contact us for any custom needs!
We ship wholesale orders

Sky Lantern Instructions

Sky Lantern Instructions:

1. Remove the sky lantern from its package and gently unfold the sky lantern one flap at a time.


2. If parts of the lantern are stuck together and cannot be pulled apart without causing damage, hold the base of the lantern with both hands and spin around so that wind enters the base of the lantern,  opening it from the inside.

Maneuver between pulling the item apart with your hands and the technique described above to expand the lantern.


3. Once expanded, use a long reach lighter to ignite the wax or fuel patch located in the center of the lantern. This will require a second set of hands. The patch may take several minutes to light.

If the lantern has a wax patch that not does catch fire, remove the wax patch from the center console and chip the wax evenly to reveal a fresh coat, and try to light again to achieve the desired result.  


4. Once the patch is lit, hold the sky lantern from the base and upper tip of the lantern until the lantern is fully expanded, which may take 90 seconds or more to do.


5. Once expanded, release the lantern into the sky. 


 Warning: Only adults should light the sky lantern. If children are near by, keep them a recommended distance of 25 ft. or more away from the point of lift off. Keep a fire extinguisher nearby. Do not light the sky lantern if there are unsuitable weather conditions like dry weather, wind, or rain, or if there are buildings or trees nearby that may impede the upward trajectory of the lantern. Do not hold the lantern longer than necessary for lift off.

Check local ordinances, city, county and state laws before lighting your sky lanterns as they may be prohibited in your area.

February 02, 2016 by Imran Keshwani

Tissue Pom Poms - 7 Easy Steps


So you've ordered your Pom Poms for your next event and they just came in the mail but they look nothing like the pom poms you saw on your computer screen.. Don't worry! We'll show you how to make the strip of tissue paper that's in front of you look like the pom poms you thought you ordered in 7 easy steps!!


Unwrap the Lanterns and More Tissue Pom Poms

1. Unwrap the Tissue Pom Poms

Pretty easy so far..right?


2. Untie the String

Make sure it is completely untied and separated from the tissue paper strip


3. Retie the String

Make a knot so the string doesn't untie. Make sure one end of the string is long- you'll be hanging your pom poms from this end once it is complete


4. Unfold the Tissue

Start unfolding the tissue with the edges to the outside. You can pull all 4 ends towards each other (see picture)


5. Pull the Tissue Out

Now, carefully pull the strips of tissue paper away one by one. To make sure your pom pom looks even, alternate sides each time you pull the tissue.

**Tissue paper is extremely thin and can tear easily - If you do get a tear, don't worry - The tears are hard to see once the pom pom is complete **


6. Pull Some More!

Keep pulling!


7. Shape the Pom Pom!

Once you've pulled out every sheet of tissue paper, and the pom pom has become slightly oval, use your hands to gently create a more round shape.


You've successfully made your first pom pom! ENJOY!!

October 29, 2015 by shugofta khan

Make It Your Own: Tissue Pom Poms at Home

The Holiday season is soon approaching and this year my family and I will be decorating our home with our very own, home made, Red and Green Tissue Pom-Poms. 

Gather your friends and family, sip your warm Pumpkin and Peppermint flavored drinks and follow the steps below, as inspired by Martha Stewart seen here, and HGTV seen here.

You will need the following Materials: 

  • Pair of Scissors  
  • Ribbon or Baker’s Twine or Florist Wire
  • Multiple sheets of red or green 20 inch tissue paper

Steps:

  1. Lay tissue paper flat and fold in 1 inch wide accordion styleFold Tissue Paper Lengthwise
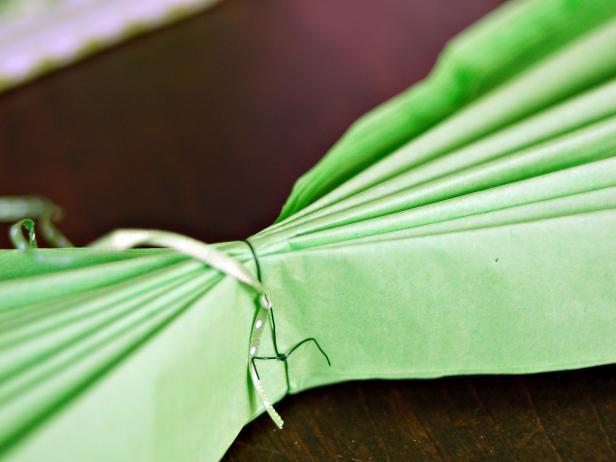
  2. Make sure you secure the center by tying it with Baker’s Twine or Florist WireKeep Middle of Tissue Paper Taut
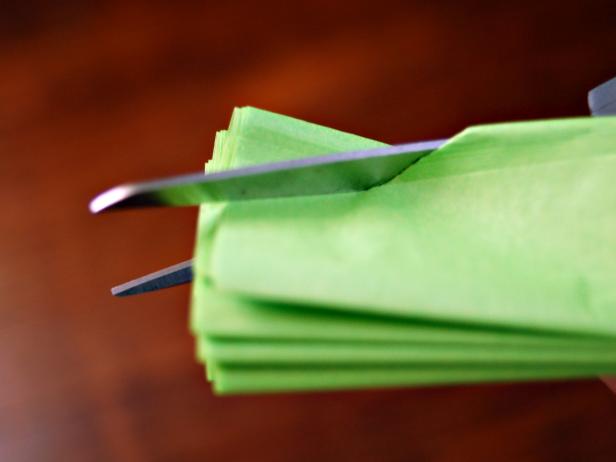
  3. Cut the ends of the fold to form rounded curve or cut into sharp points for rigid ends
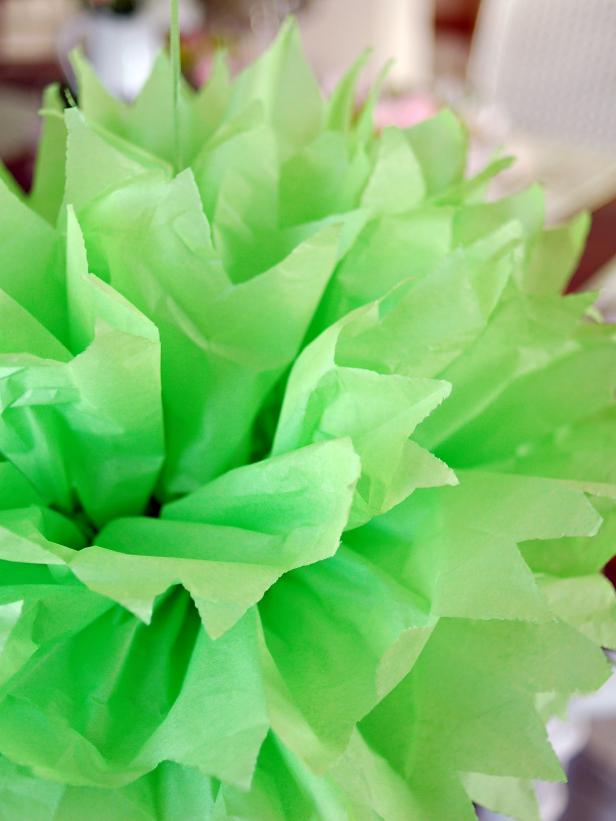
  4. Separate folded tissue paper one layer at a time to fluff and bloom Pom-PomLime Green Tissue Paper Pom Pom


Now place your beautiful Pom-Poms as ornaments on your Christmas Tree's or use them as decorations around your home.  

June 17, 2015 by Imran Keshwani